Course Reuse
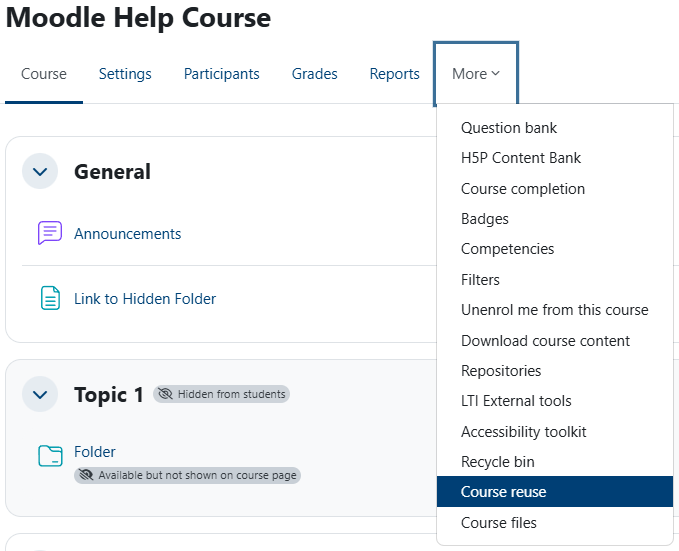
Moodle allows you to reuse your course content, saving you significant time. Course reuse gives you options for importing, backing up, and restoring your courses. It can be found under the More dropdown in each course.
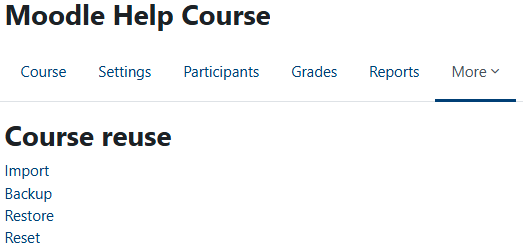
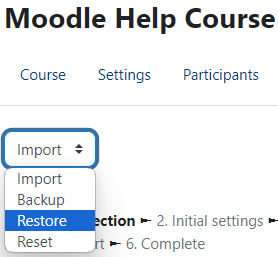
There are 4 options - we will explain 3 of them (Reset is not as useful as it may sound).
Importing Courses
If you are teaching a course that you have previously taught, you can import the materials from the older course into the newer course quite painlessly and then make any necessary changes.
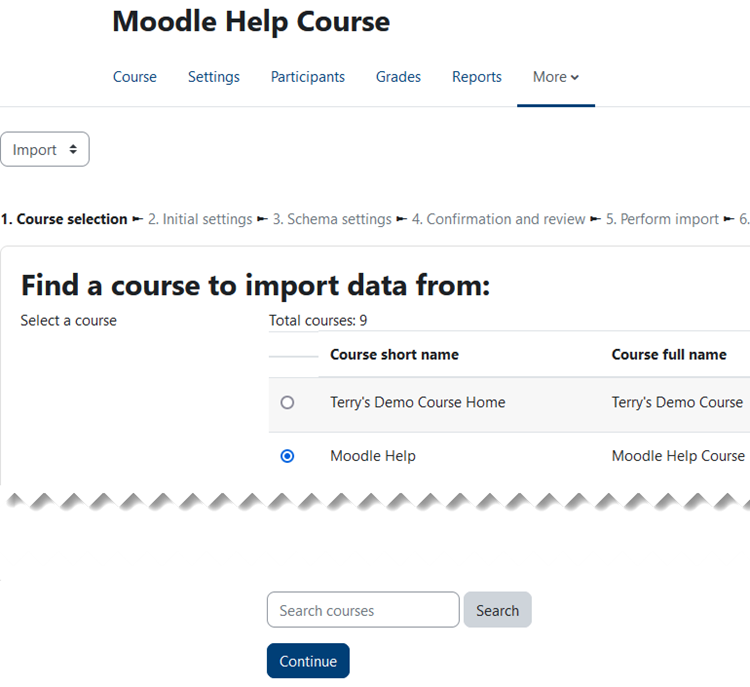
On the Course reuse page, leave the default option set to Import. In the Find a course to import data from: section, select the older course from those listed by selecting the radio button to its left, then click the Continue button. If you don't see it in the list, you can use the Search function by entering part of the course's name in the Search courses box and clicking the Search button.
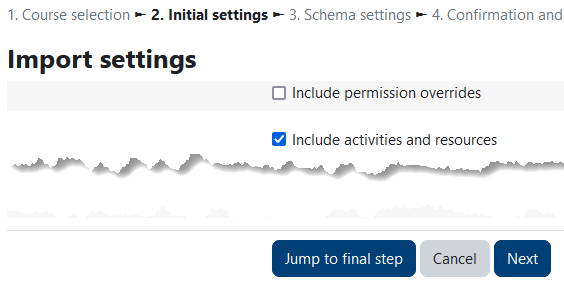
In most cases, you will want to leave all the boxes selected on the Import settings page and click Next.
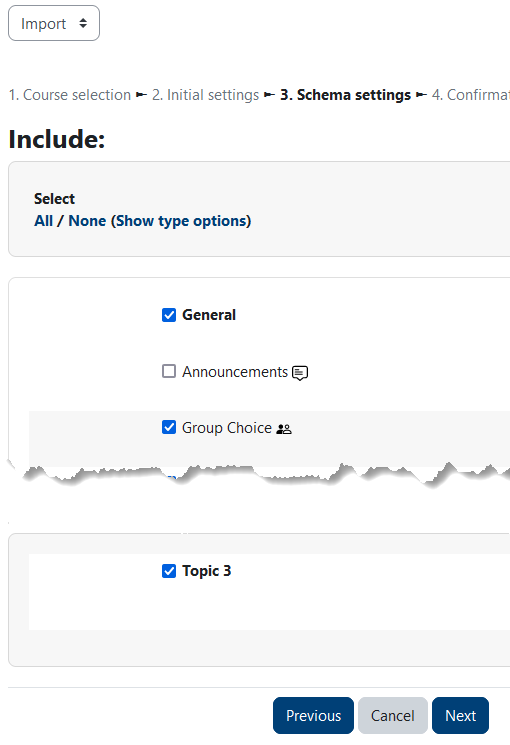
De-select any components of the course you DO NOT wish to import by clicking on the checkmark to their right. As an example, you do not need to import the Announcements (News forum in older courses). You can also de-select entire topics. When you are sure you only have the components you want selected, click the Next button.
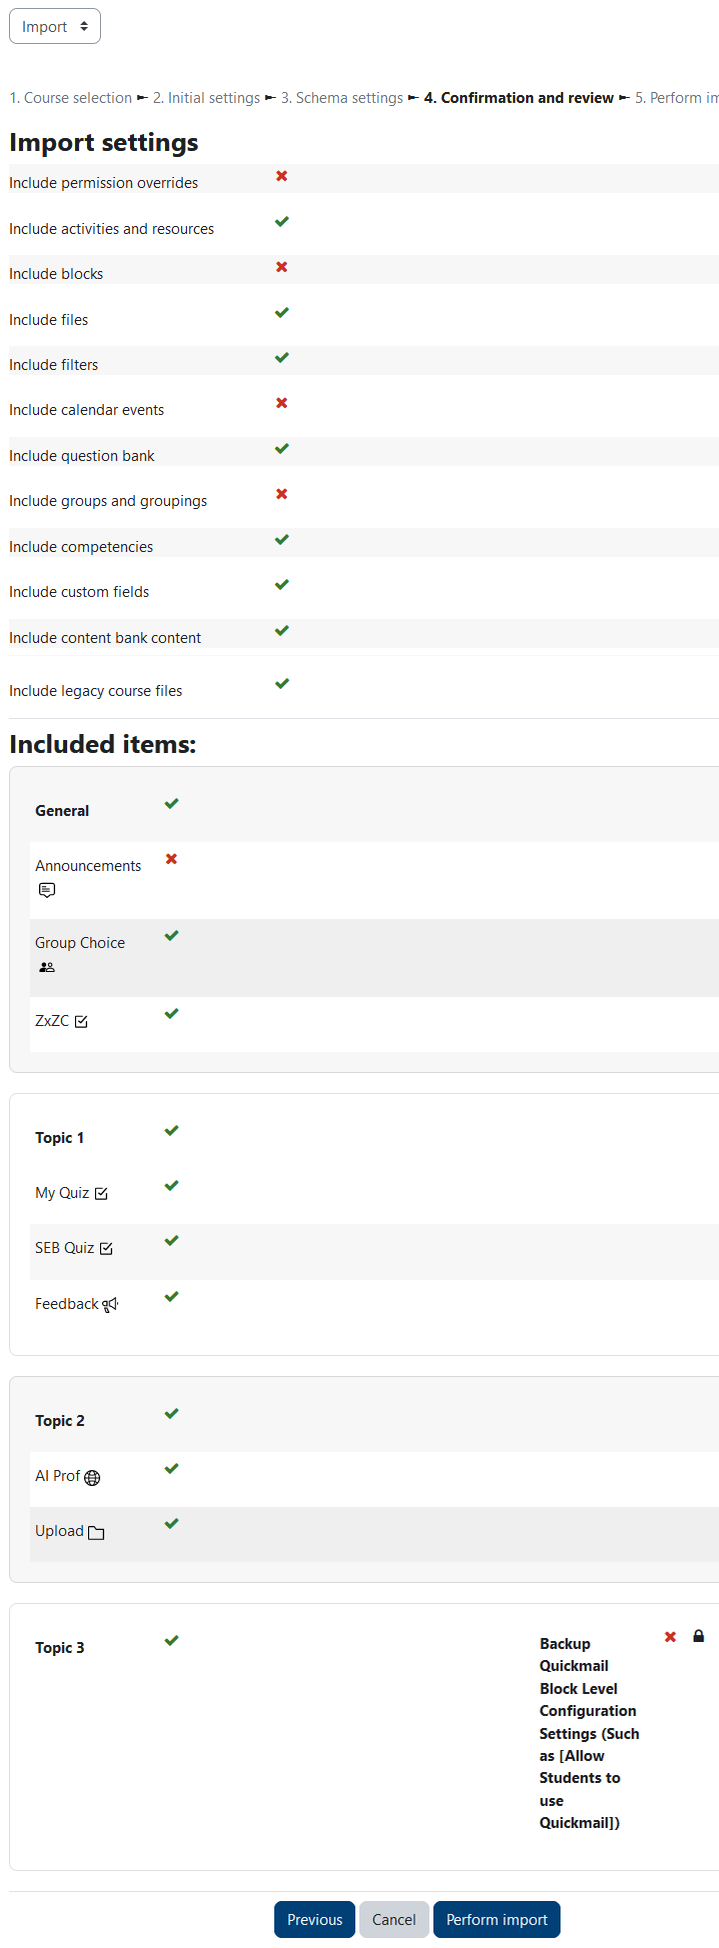
Confirm your selections by scrolling to the bottom of the page and clicking on Perform import.
When the import is complete, click on the Continue button to review your course and make any necessary changes.
Backing Up A Course
You can back up your entire course or any number of individual items for your own files or to make it easier to share with another person. When sharing, it's best to have the item(s) to be shared in the top section or the first topic.
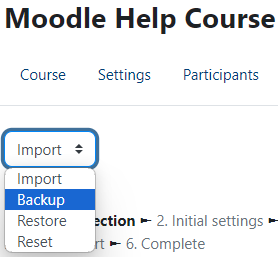
On the Course reuse page, select Backup from the dropdown menu.
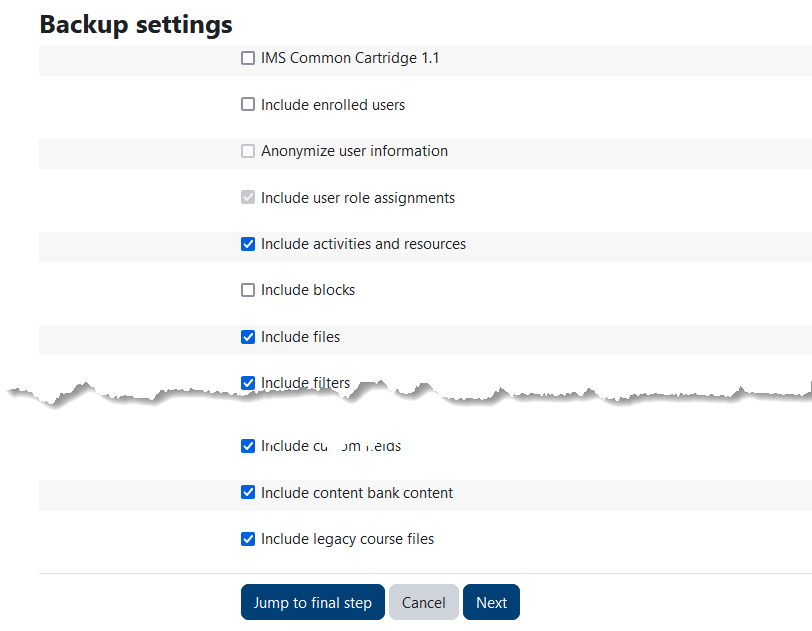
The Backup settings allow you to select the types of components of the course you would like to choose from. If you are backing up the entire course you can generally leave the defaults selected and hit the Jump to final step button. If you are picking and choosing what to back up, you can leave the selections as they are and hit the Next button.
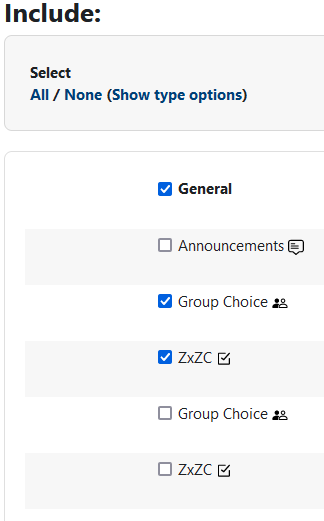
On the Include page, you can select the items you want backed up. By default, all items are selected. You can exclude an entire topic by de-selecting the checkbox beside the topic name. Of course, you can also leave out any individual item by de-selecting its checkbox. Under Select, you can use the All and None links to speed things up or reset your selections.
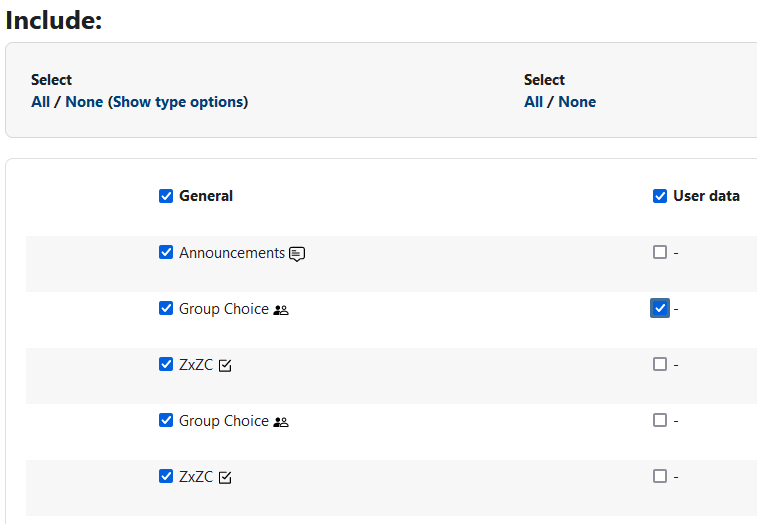
You may want to save student data with your backup. Similar to how you select which activities and resources you back up, you can select which of these items should have their student data included.
When you are finished with your selections, click on the Next button to get to the final stage. Here, you are able to choose the file name. The default name includes the course code, date, time, and some other Moodle-related information. Feel free to name it anything you like. You will also see confirmation of what is being included in your backup. When you are sure everything is kosher, click on the Perform backup button to finalize the process.

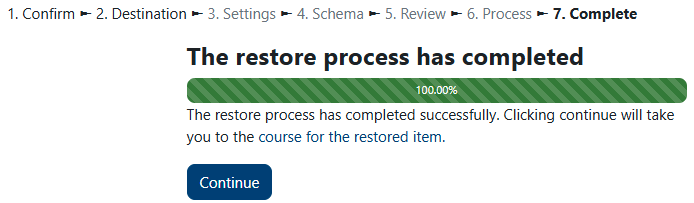
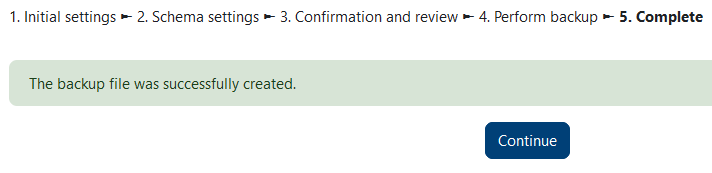
Depending on the content of your course, the backup process might take a little time. When finished, you will see the following message:
Clicking on the Continue button will take you to the backup area. Scrolling down to the User private backup area will show you all backups you have created. From here you can download your backups.

Restoring A Course
You or your colleague can now restore a backed-up item into a different course. From the course into which you wish to import (isn't English fun?), under the Course reuse page select Restore from the dropdown menu.
There are a couple of ways to restore a course. The first is to upload a previous backup file and restore it. In the Upload a backup file section, add your file and click on the Restore button.
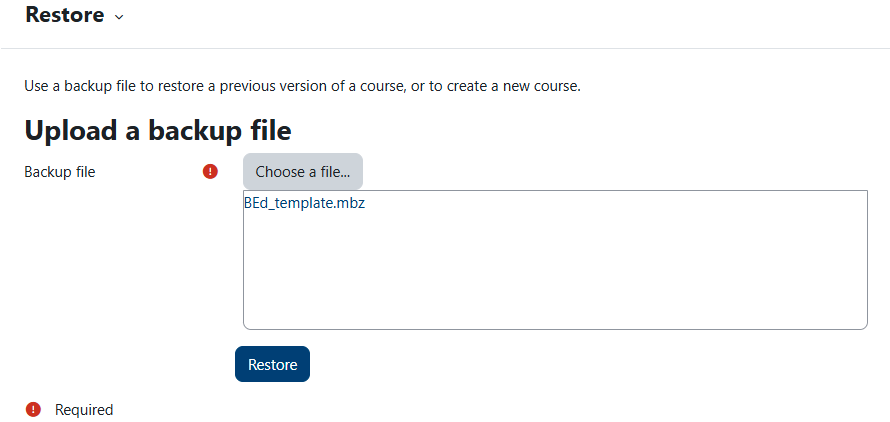
The second way is to click on the Restore link beside the appropriate backup in the User private backup area.

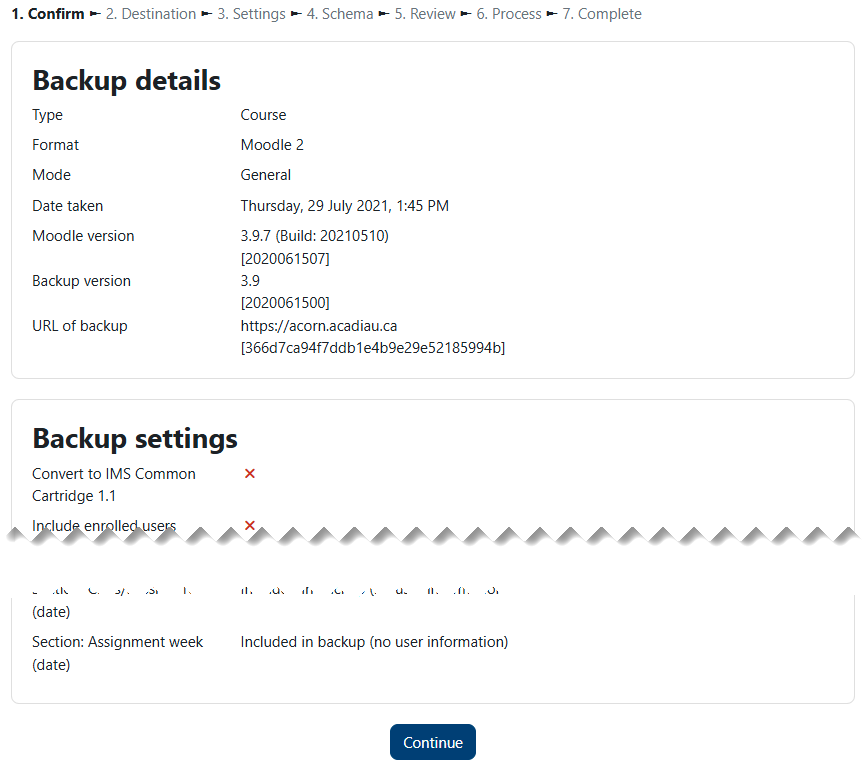
On the Confirm page, you will see what is to be restored. Click on the Continue button.
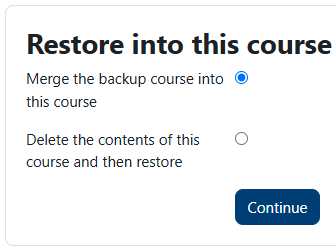
You now have two options. You can either restore into the current course or into another course of yours. Let's start with Restore into this course. Be very careful at this stage. If you already have content in your current course that you don't want to lose, be sure to select Merge the backup course into this course. Otherwise, you will delete everything that you already have. Click on the Continue button.
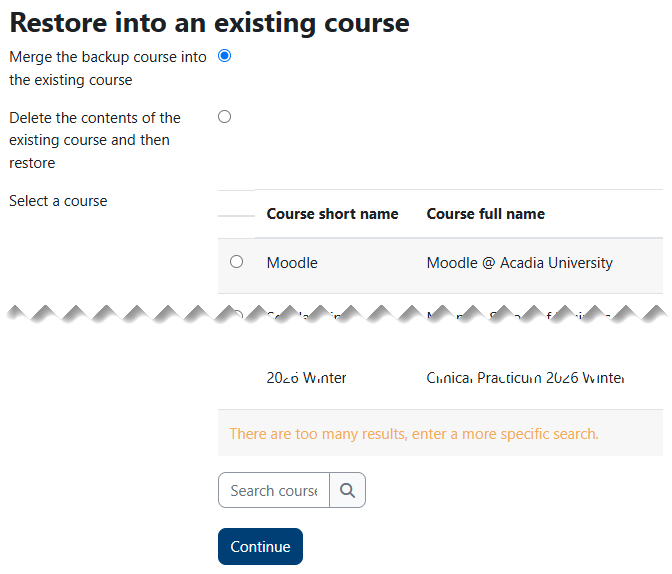
Similarly, if you want to restore the backup into another course, you need to be careful not to overwrite any existing content. Select Merge the backup course into the existing course unless you are sure you want to start fresh. You can select one of your courses from the list. If you don't see the one you want, you can use the Search courses box to find and select the one you want.
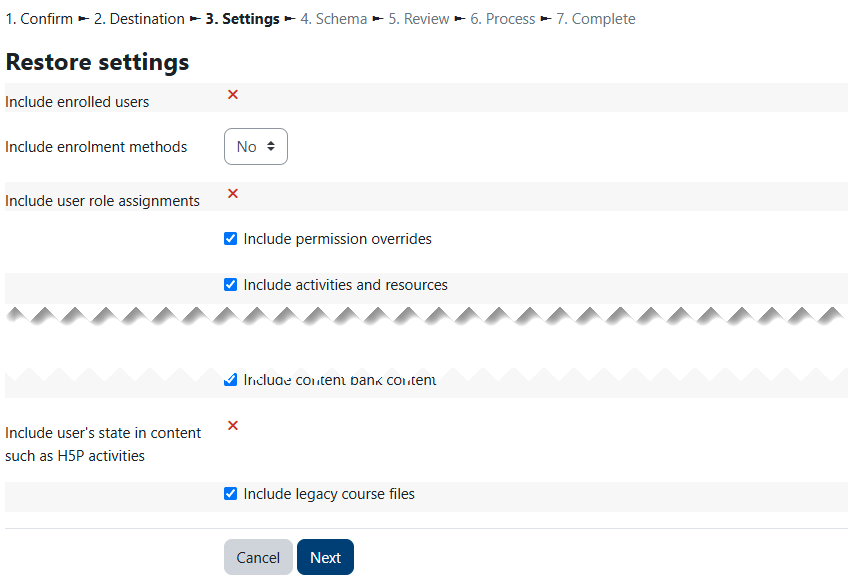
Here you will have an opportunity to make some changes to your Restore settings. De-select anything you don't want to be included, then click on the Next button.
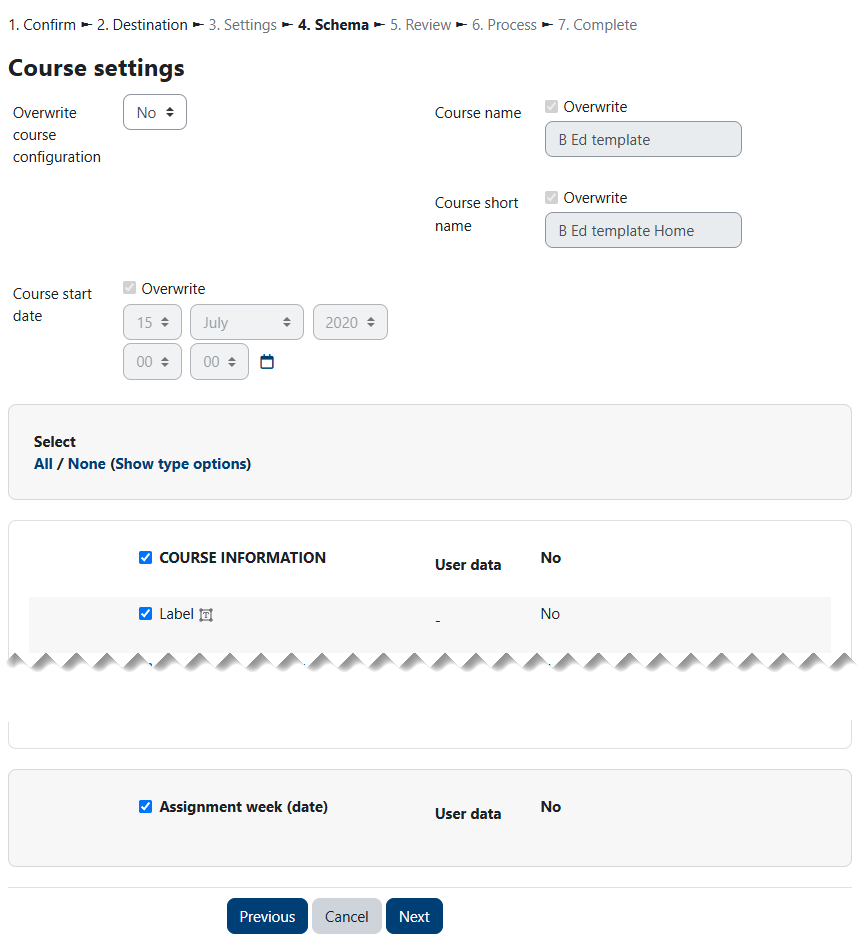
Now you can de-select any bits you don't want to import. When you're sure of your choices, click on the Next button. In most cases, it is best to leave Overwrite course configuration to No.
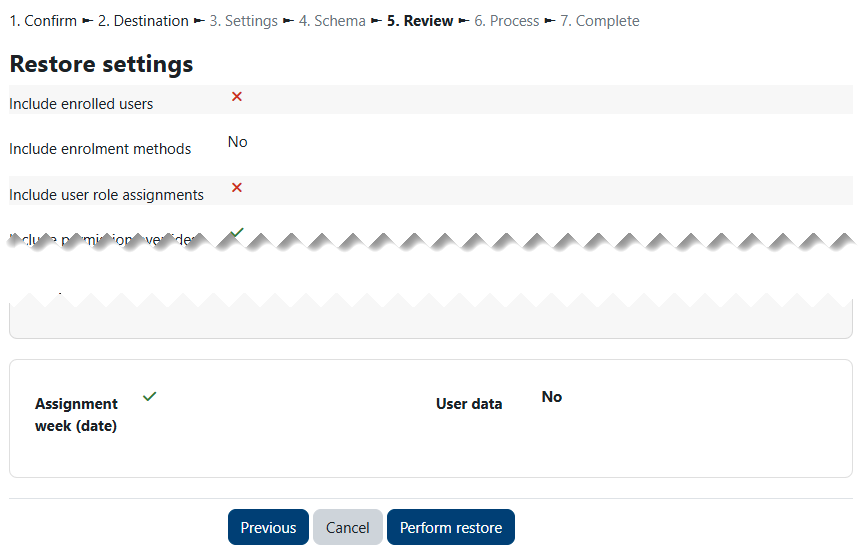
Review your selections and hit the Perform restore button.
As with a backup, the amount of time it takes to restore the course depends on the content. When it is finished, you can click on the Continue button to return to the course and see the results.