Groups
Groups are a useful tool for allowing or preventing access to or from specific activities or resources. One especially helpful use is for setting up accessibility overrides for Quizzes. These groups can now also be hidden from students to maintain privacy. We will explain this process below.
Creating a Group
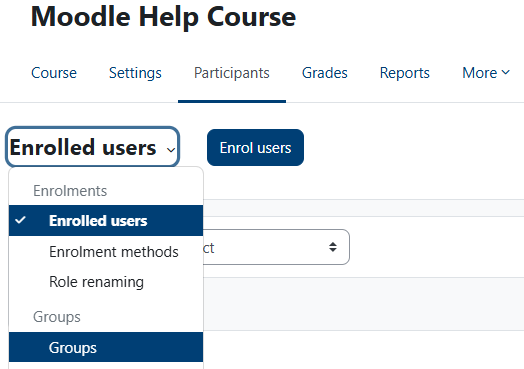
From your main course page, select the Participants link at the top of the page, then click on the Enrolled users dropdown list and select Groups.
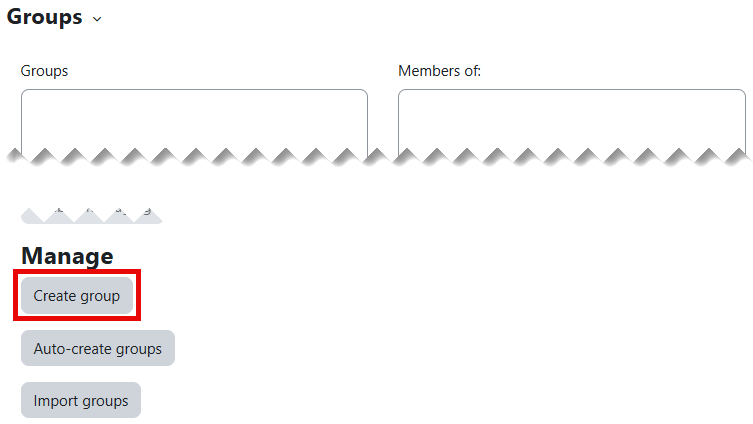
Now, scroll down and click on the Create group button to get started.
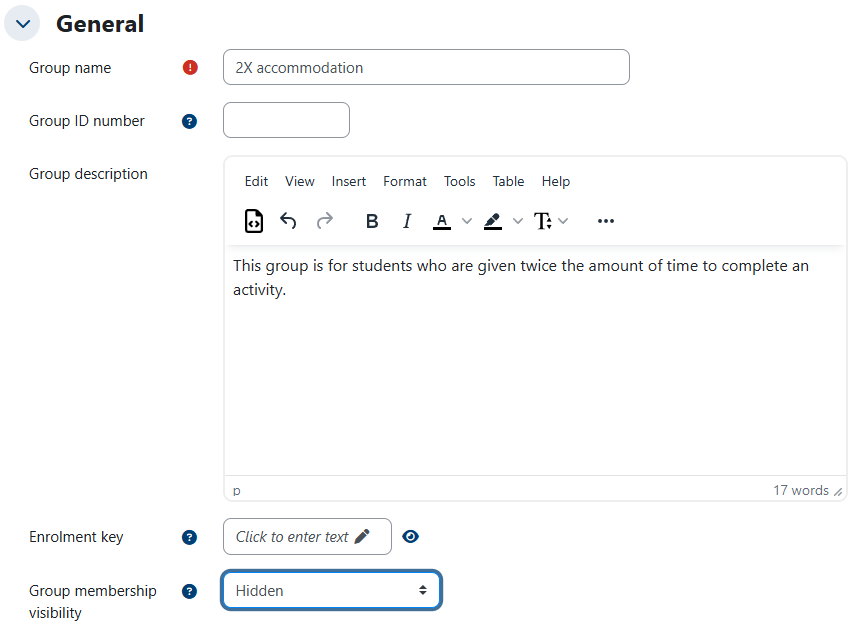
The only setting you need to fill in is the Group name. Feel free to use the other settings as you see fit. We will discuss Group membership visibility further down this page.
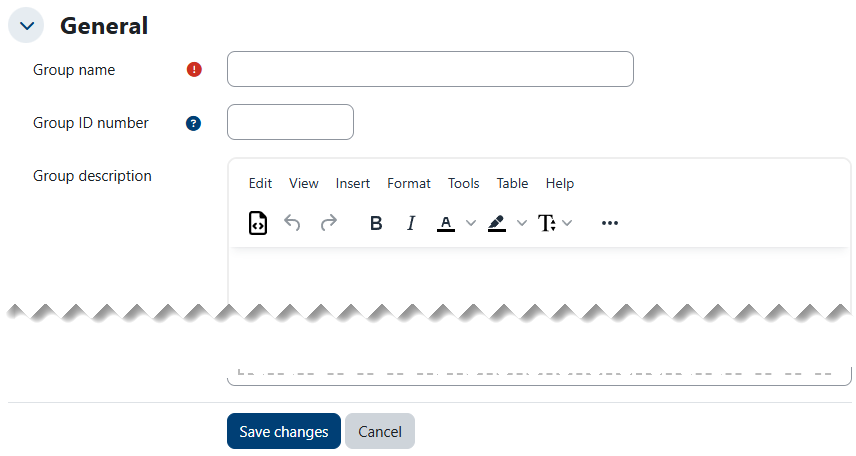
When you are done, click on the Save changes button to complete the setup.
Adding Group Members
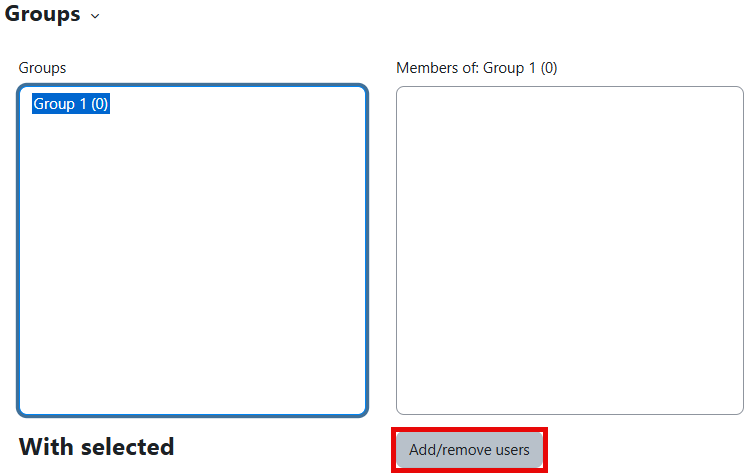
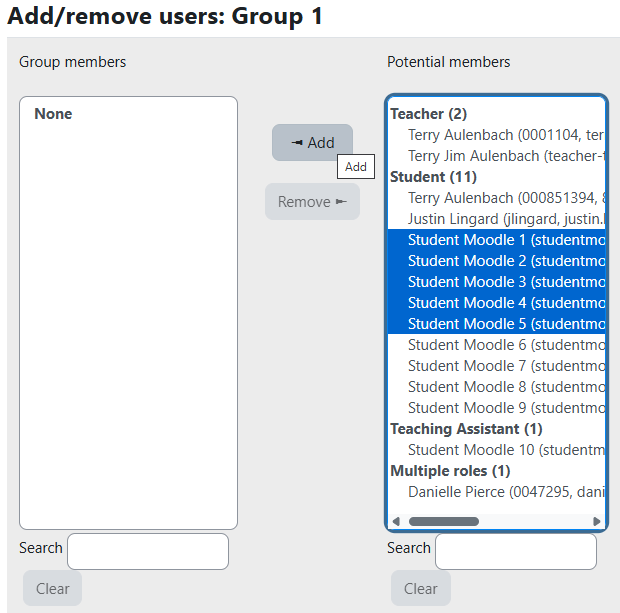
Now that you have a Group added, you can add members. Highlight the Group you'd like to add members to or remove them from and then click on the Add/remove users button.
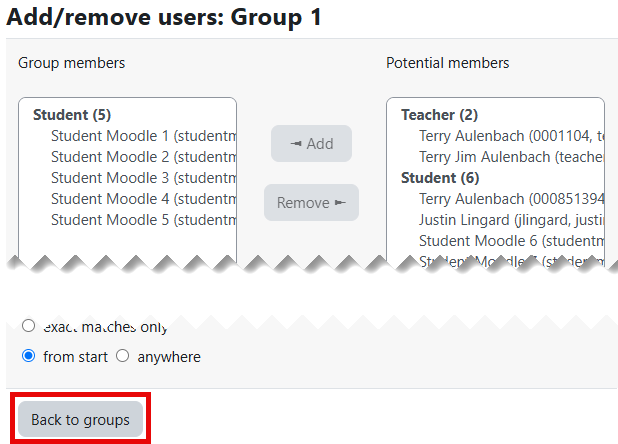
Now select the appropriate users in the right pane and click the ◄ Add button to add them to the Group. With larger classes, you may want to use the Search option to find the desired user. If you later want to remove users from a Group, simply select the user(s) and use the Remove ► button.
When you are finished, use the Back to groups button to return to the main Groups page.
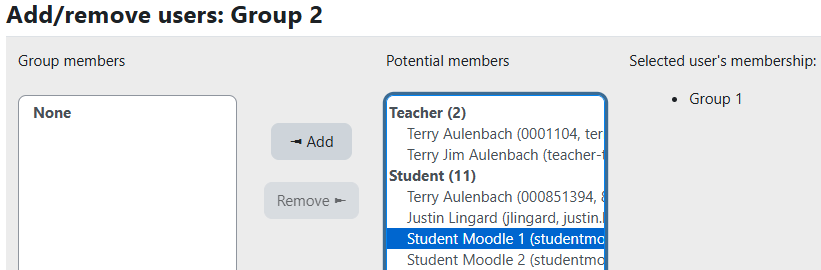
Once you have at least one Group set up and you are adding users to another Group, if the user you select in the right panel has already been assigned to a Group, you will see that assignment under the Selected user's membership column on the right. This is simply for information purposes, as users can be in multiple Groups.
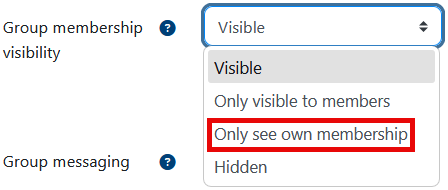
Group membership visibility
Group membership visibility allows you to control whether users can see who belongs to which groups. This is especially important when you have several students with similar accommodations. When you create a new group, from the Group membership visibility dropdown list, select Only see own membership.
Now, when you add users to the Group, other users will not be able to see the members of that Group. If you are using this Group to set up overrides for a Quiz or other activity where they have extra time, their privacy is protected, and your valuable time has been saved by not having to set up individual overrides.
After adding a student to this Group, only that student can see that they have been added (student view from participants list below).
